
California Mission Olive Harvest Technique
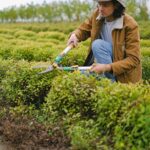
Mission olives can be harvested from October to February, but harvest timing is not fixed by date. Choose based on fruit condition and intended use. Mission olives can be used for either table curing or pressing, so harvest gently and keep different ripeness stages separate. The basic technique is to choose your end use, hand-pick sound fruit into clean containers, sort it immediately, and move it into curing or milling.
Use this table to plan the kind of harvest you want before spreading nets under the tree.
| Harvest Goal | Typical Position Within the October-to-February Window | What to Look For |
|---|---|---|
| Green brine-cured olives | Earlier part of the seasonal window | Firm, mostly green fruit with little color change |
| Oil with a grassy, more assertive character | Earlier part of the seasonal window | Sound fruit that is still largely green or just beginning to turn |
| Riper olives or milder oil | Later part of the seasonal window | Fruit showing more purple or black color while still firm and sound |
| Mixed home harvest | Any point when fruit meets your goal | Separate green, turning, and dark fruit into different containers |
What Makes Mission Olive Harvest Different
California Mission olives are a heritage variety associated with the state’s early mission orchards. They are unusual in that they work well both as table olives and as an oil olive.
That versatility changes how you harvest. A green olive intended for brine curing is not picked at the same stage as fruit intended for a mild, ripe-fruit oil. You are not simply waiting for the tree to be “full of olives” or for every fruit to turn black.
Mission fruit also varies across one tree. Olives on the sunnier outer canopy may color earlier than olives inside the tree. Fruit on different branches can be at different stages on the same day, especially after uneven watering, variable sun exposure, or a stretched-out bloom period.
The goal is not perfectly matching color. The goal is a clean lot of fruit that suits one use.
Choose the Harvest Goal Before You Pick
Treat the calendar as a scouting window, not the picking rule.
Start by deciding what you want from this batch. That choice tells you which olives to leave, which to pick, and how carefully to separate them.
For Green Table Olives
Pick fruit that is firm, sound, and mostly green. Green olives will still be bitter straight from the tree; they need a proper curing process before eating. Do not mix in heavily damaged, shriveled, moldy, or fallen fruit.
Green brine-cured Mission olives are known for a mild table-olive character. If you want a traditional green olive, avoid waiting for the whole crop to darken.
For Oil
Earlier-picked Mission olives can make oil with a grassy, more astringent character. Fruit picked later in ripeness can produce a smoother, milder oil.
For home-scale oil pressing, clean fruit condition matters as much as color. Avoid fruit with rot, insect damage, or obvious bruising. Those olives can lower the quality of the entire batch.
For a Mixed Harvest
A mixed harvest can work well when one tree ripens unevenly. Keep each color group in its own container:
- Green fruit for green table curing or a greener oil style
- Turning fruit for a balanced batch
- Darker fruit for ripe-style curing or milder oil
Labeling containers by tree, side of the tree, or fruit color helps if you want to compare results later.
How to Harvest California Mission Olives Without Bruising Them
Clean, dry picking surfaces, gentle hand harvesting, immediate sorting, and cool handling help protect olives from bruising.
Step 1: Prepare a Clean Picking Area
- Spread a clean tarp, harvest net, or sheet under the tree before you begin. It catches fruit without making you crawl through mulch or soil to find it later.
- Bring clean, food-grade buckets, picking bags, or ventilated harvest crates. Use more than one container if you plan to separate fruit by color or intended use.
- Pick only fruit that is dry on the surface. Wet leaves and wet olives pack together more easily and carry extra debris into the container.
- Keep containers out of direct sun as you fill them. Harvested olives are living fruit, and heat plus pressure can quickly damage their quality.
Avoid using deep bags that compress fruit at the bottom. A container that lets olives stay in a loose layer is easier on the fruit and easier to sort.
Step 2: Inspect the Fruit on the Tree
- Walk around the tree and look at fruit from the outer canopy, inner canopy, and different sides of the tree.
- Check color, firmness, size, and skin condition. A sound olive should feel firm rather than soft, collapsed, or mushy.
- Choose the ripeness group you want before beginning a branch. If you are making more than one type of batch, keep containers clearly separated from the first handful onward.
- Leave fruit that is visibly diseased, moldy, badly insect-damaged, or split from the rest of the crop.
Do not judge readiness by a single olive near the top of the tree. The useful signal is the overall condition of the fruit you can realistically harvest.
Step 3: Pick Gently by Hand
- Cup a small cluster of olives in your hand.
- Roll or pull the olives free with your fingers, working along the branch rather than yanking downward.
- Let fruit fall onto the net or place it directly into your picking container.
- Move to another branch when the olives reach the color stage you selected.
Hand harvesting is the gentlest option for a backyard tree. Light hand rakes can help with a larger crop, but use them carefully. Aggressive raking can tear leaves, snap young shoots, and bruise fruit.
Avoid beating branches with poles. The immediate speed is rarely worth the damage to the tree or the fruit. Olive trees bear on young growth, so preserving productive shoots matters for future harvests.
Step 4: Sort the Fruit Right Away
- Pour a manageable amount of olives onto a clean tray, tarp, or shallow container.
- Remove leaves, twigs, dirt, shriveled fruit, and damaged olives.
- Keep green, turning, and dark fruit in separate lots if they will be cured or milled differently.
- Set aside fruit that fell to the ground rather than mixing it with clean-picked fruit.
Sorting is where a home harvest becomes useful food rather than a random bucket of olives. A clean, uniform lot cures more predictably and gives a mill a better batch to work with.
Step 5: Finish the Harvest for Its Intended Use
- For oil, take the sorted fruit directly to the mill or home-processing setup without avoidable delay. Keep it cool, shaded, and protected from crushing during transport.
- For table olives, begin a tested olive-curing process after sorting. Fresh olives are too bitter to eat out of hand, and curing is what makes them palatable.
- Clean your nets, containers, and sorting surface before putting them away. Leaves and crushed fruit left in equipment can attract pests and create unpleasant odors.
- Record the harvest date, fruit color, tree location, and intended use. Those notes make it much easier to improve next year’s harvest timing.
Harvest Timing in Sacramento Zone 9 and Other Inland Gardens
Hardiness zones describe winter cold tolerance, not the exact date when olives ripen. Fruit condition, rather than a fixed date, guides harvest timing.
Start watching the crop in early fall and continue checking fruit through winter. Look for the change you want in the fruit itself.
A few local conditions can shift the practical picking date:
- Heat exposure: Fruit on the hottest, sunniest side of a tree can color sooner.
- Crop load: A heavily loaded tree may ripen unevenly.
- Water stress: Drought-stressed trees can produce smaller fruit or fruit that does not develop evenly.
- Rain or humidity: Pick dry fruit when possible, and do not leave wet fruit packed tightly in containers.
- Bird pressure: If birds are taking the ripest olives, harvest at the stage that fits your intended use instead of waiting for perfect uniformity.
For a small backyard crop, several short picking sessions are often better than one all-or-nothing harvest.
Handling Mission Olives After Picking
Freshly picked olives need different handling depending on whether they are headed to a curing container or a mill.
Fruit for Table Curing
Keep table-olive fruit clean and separated by ripeness. Green fruit and ripe dark fruit often use different curing approaches, so mixing them can make the finished batch inconsistent.
Do not use raw olives as a test of ripeness; assess the fruit by color, firmness, and skin condition instead. Their natural bitterness is normal and does not mean the fruit is bad. Match the curing approach to the color and style you harvested.
Fruit for Oil
For oil, keep fruit cool, shaded, and protected from crushing during transport. Damaged skin and long storage both work against fresh flavor.
If you are using a local mill, ask about its intake requirements before harvest day. Some mills want fruit delivered in specific containers or separated by variety. Knowing that before you pick prevents last-minute mixing or repacking.
Fruit You Do Not Plan to Use
Remove dropped, rotten, or damaged fruit from beneath the tree. Do not leave piles of rejected olives in the harvest area, especially in warm or humid weather.
Compost only fruit that is free of disease concerns and mixed well into a larger compost pile. If you suspect a disease issue, dispose of the fruit rather than spreading it around the garden.
Common California Mission Olive Harvest Mistakes
Picking by Date Alone
The biggest mistake is rushing the harvest. Mission olives can be harvested over a broad fall-to-winter period.
Waiting for Every Olive to Turn Black
A tree does not need to look uniformly dark before you harvest. Earlier-picked fruit can make a greener, more assertive oil.
Mixing Every Olive Into One Bucket
Mixing green, turning, dark, dropped, and damaged olives creates a batch that is difficult to cure consistently and less useful for oil. Separate fruit while picking, not after every container is full.
Pulling Hard on Fruiting Branches
Hard stripping can break twigs and remove next season’s fruiting wood. Use finger pressure, light raking, and patience instead of force.
Letting Harvested Fruit Sit in Heat
Olives left in sealed bags can bruise and sweat. Avoid crushing the fruit in sealed bags.
Check the Harvest and Protect the Tree
Before ending the day, make sure you have:
- Removed nets, tarps, and containers from beneath the tree
- Cleared fallen fruit and broken twigs from the harvest area
- Checked branches for accidental tears or breaks
- Written down the fruit stage and intended use for each batch
Do not prune heavily just because some fruit is hard to reach. It is usually better to leave inaccessible olives than to remove productive wood in the middle of harvest. After cleanup, decide whether each batch is going to a mill or into curing, then handle it accordingly.
Frequently Asked Questions
When do I pick olives in Sacramento Zone 9?
October to February is a possible Mission olive harvest period, but pick according to fruit condition rather than a fixed date. Check for the color, firmness, and flavor style you want, then harvest dry, sound fruit. Green fruit is suitable for green curing, while later-ripening fruit can suit a milder oil style.
How do I harvest olives by hand?
Hand-harvest olives by rolling or pulling small clusters free with your fingers and catching them on a clean net or tarp. Work gently along branches instead of yanking downward, then place sound fruit in clean containers. Sort out leaves, twigs, damaged olives, and fruit that has been sitting on the ground.
Can I eat Mission olives straight from the tree?
No. Fresh Mission olives are naturally bitter and need curing before they are enjoyable to eat. Use only clean, sound fruit for table curing and choose a tested curing method that matches whether the olives were harvested green or ripe.
Should I wait until all Mission olives are black?
No. Green Mission olives are suitable for green brine-cured table olives, and early-picked fruit can produce a greener, more assertive oil. Harvest the ripeness stage that fits your goal instead of waiting for complete color uniformity.
Can one Mission olive tree provide both table olives and oil?
Yes. A single Mission olive tree can supply separate lots for table curing and oil when you sort fruit by ripeness and intended use. You can harvest separate lots from the same tree for different purposes if you keep fruit stages apart. Pick firm green olives for green curing, reserve riper sound fruit for a later-style batch, and keep damaged fruit out of both.